Candle-making is a relaxing and rewarding hobby that has been enjoyed for centuries. The process involves:
- Melting wax.
- Adding fragrance and color.
- Pour the melted wax into a container with a wick.
Once the wax cools and hardens, you create your handmade candle. While it may seem like a simple process, many steps are involved in making candles.
It’s important to prepare properly before diving in to ensure your candles turn out as expected. This includes gathering all necessary materials, setting up your workspace, and learning the basic candle-making process.
Brief Explanation of the Basic Candle-Making Process
The basic candle-making process involves melting wax and adding fragrance and color before pouring it into containers with pre-waxed wicks. As the wax cools and hardens, the wick becomes secured, creating a solid candle that can be burned for hours.
Several types of wax are used in candle making, such as soy wax or beeswax. Fragrances can be added to candles using essential oils or fragrance oils, while colorants come in various forms, such as liquid dye or chips.
Importance of Preparation and Setting up Your Workspace
Preparation is key when it comes to candle making. Before starting the process, ensure you have all the necessary materials, such as wax, wicks, fragrance oils, colorants, containers, etc.
It’s setting up your workspace properly before beginning any project is also important. Choose a well-lit area with plenty of space for all your supplies.
Protect surfaces from spills by covering them with newspaper or plastic sheeting. By preparing beforehand and setting up your workspace correctly, you’ll be able to enjoy the process without worrying about interruptions or having to scramble for missing items halfway through. In addition, you’ll also avoid any potential accidents while handling hot wax or other materials.
Gathering Materials
Candle-making is a fun and fulfilling hobby that requires just a few essential materials. These materials are easy to find and usually available at your local craft store or online. Gather all of the necessary supplies before beginning the candle-making process to avoid any interruptions or problems along the way.
List of Essential Materials Needed for Candle Making
The following is a list of essential materials needed for candle making:
- Wax – Different kinds of wax are available, such as paraffin, soy, beeswax, or palm wax.
Choose the type of wax you prefer to work with, depending on your preferences and needs.
- Wicks – Cotton wicks come in different sizes, thicknesses, and lengths.
Choose a wick that is appropriate for the size of your container or mold.
- Fragrance oils – Use fragrance oils made specifically for candles to add scent to your candles.
You can choose from many different scents like lavender, vanilla, and citrus flavors like lemon or orange.
- Colorants – Use liquid colorants or dye chips to add color to your candles.
Be sure the colorant is suitable for use in candle making, as some dyes can be harmful when burned.
- Mold release spray (for molds only) helps remove finished candles from molds without damaging them.
- Thermometer – Helps measure temperature accurately
- Heat-proof containers (for melting wax)}
Where to Purchase Materials
You can purchase all the materials you need online on Amazon.com or from craft stores such as Joann Fabrics Michaels, Hobby Lobby, etc. Many online retailers carry everything you need, from wax and wicks to fragrance oils and colorants. You can also visit your local craft stores to browse the selection of candle-making materials.
Most craft stores will carry a variety of wax types, wicks, fragrance oils, and colorants. Some specialty shops that focus just on candle-making or soap-making may carry a wider range of materials as compared to larger retail stores.
If you are looking for organic or natural materials like beeswax or soy wax, it is best to check out online specialty shops catering to such needs. Once you have all the necessary materials gathered, it’s time to start preparing your workspace for candle-making.
Preparing Your Workspace
Choosing a Clean and Well-lit Area
Before beginning the candle-making process, choosing an area that is clean and free of clutter is important. You don’t want any distractions or hazards that could potentially cause a mess or even an accident. Make sure you choose a well-lit area so you can see what you’re doing clearly.
It’s also important that the workspace you choose has good ventilation. Wax emits fumes when it’s heated and melted, so having fresh air circulating will help prevent any headaches or respiratory issues resulting from prolonged exposure to these fumes.
Covering Surfaces with Newspaper or Plastic Sheeting
Candle-making can get messy, especially if you’re new to the craft. It’s always better to be safe than sorry, so cover your workspace with newspaper or plastic sheeting before beginning. This will make cleanup much easier once you’re finished.
If you’re using newspaper, use enough layers to prevent any wax from seeping onto your work surface. If using plastic sheeting, make sure it is sturdy and not too thin so it doesn’t tear easily.
Setting Up a Double Boiler or Melting Pot
A double boiler is an essential tool for candle making as it allows for the gentle melting of wax without scorching or burning it. If you don’t have a double boiler specifically designed for candle-making, you can create your own using two pots – one larger.
Fill the larger pot halfway with water and bring it to a boil on your stovetop. Once boiling, place the smaller pot inside and add your wax to melt slowly in this top pot.
Alternatively, a melting pot designed for candle-making can be used instead of a double boiler. Once everything is set up and ready to go, you’re one step closer to creating beautiful candles that you can enjoy or gift to your loved ones!
Melt Wax
Types of wax to use for candle making
Choosing the right wax is essential in candle making, as it will affect the appearance, burn time, and fragrance throw of your candles. Different types of wax are available in the market, including paraffin wax, soy wax, beeswax, and palm wax. Paraffin wax is the most commonly used type of candle wax.
It’s affordable and produces a bright flame. Soy wax is a natural alternative to paraffin that is becoming increasingly popular due to its sustainability and eco-friendly properties.
Beeswax is another natural option that has a unique honey-like scent. Palm wax comes from palm trees and gives candles an interesting texture.
Melting wax using a Double Boiler or Melting Pot
To melt your candle wax, you will need either a double boiler or a melting pot dedicated solely for candle-making purposes. A double boiler consists of two pots: one large pot filled with water and another smaller pot sitting inside it where you place your wax for melting slowly at low heat. Alternatively, you can use a melting pot specifically designed for candle making that has its own heating element.
Fill the large pot about halfway with water and bring it to a boil before reducing the heat to maintain a simmering temperature. Then place the smaller pot on top of it with your measured amount of solidified or chopped-up pieces of raw candle-making material inside it.
Allowing the chips or broken pieces to melt completely without stirring ensures all air pockets disappear from boiling action while also decreasing chances for separation during pouring as they slowly liquefy over time within the melted liquid mixture. These methods both work well at evenly distributing heat across all surfaces while protecting against overheating or burning by providing gentle uniform heating distribution only when needed until fully melted but never boiling over, as would happen under a direct heat source.
Adding Fragrance and Color
Types of fragrance oils and colorants to use in candles
One of the most exciting parts of candle making is experimenting with different fragrances and colors. There are endless options available, so it is choosing the right ones for your specific project is important.
When it comes to fragrance oils, there are a few things to keep in mind. First, make sure you’re using oils specifically designed for candle making.
Essential oils can be used as well, but they may have a weaker scent throw than fragrance oils. When it comes to choosing colorants, you can either use liquid dyes or dye chips.
Liquid dyes are more concentrated and easier to mix into the wax, while dye chips are easier to measure and tend to produce more consistent results. Whichever option you choose, make sure you’re using high-quality products that won’t bleed or fade over time.
Measuring fragrance oils and colorants accurately
Accurately measuring your fragrance oils and colorants is key to producing consistent results with each candle you make. For fragrances, a good rule of thumb is to use between 6-10% oil per pound of wax (although this can vary depending on the strength of the oil).
Use a digital scale or graduated cylinder to measure your fragrance oil. When it comes to measuring colorants, start by adding just a small amount at first – you can always add more if needed.
As mentioned earlier, liquid dyes will be highly concentrated, so start with just a drop or two per pound of wax until the desired color is achieved. Overall though, it’s important not only to add enough but also not too much fragrance if one has a sensitive sense of smell or allergies towards certain scents, which might cause irritation, etc., along with ensuring that all measurements are accurate in order to maintain the desired scent and color intensity.
Preparing Candle Containers
The container you choose for your candle is just as important as the wax and wick you use. The container should be heat-resistant, durable, and visually appealing.
Glass jars or metal tins are the most popular choices for candle-making because they are easy to work with and come in different sizes. When choosing a container, consider the type of wax you are using.
For example, soy wax can adhere to glass better than other types of wax. If you’re using a tall or narrow container, make sure your wick is long enough to reach the bottom.
Choosing the Right Container for Your Candle
The type of candle you want to create will also influence your choice of container. A jar candle will require a wider-mouthed jar so that it’s easier to light, while votive candles may need smaller containers that match their size. Deciding on a clear glass jar or an opaque tin will also depend on what aesthetic finish you’re going for.
Prepping Containers by Cleaning and Securing Wicks
Cleaning your containers before pouring melted wax is essential. Any dust or debris on the surface can affect how well the wax adheres to it later on. Wash containers with hot soapy water, then dry them thoroughly before proceeding to prep.
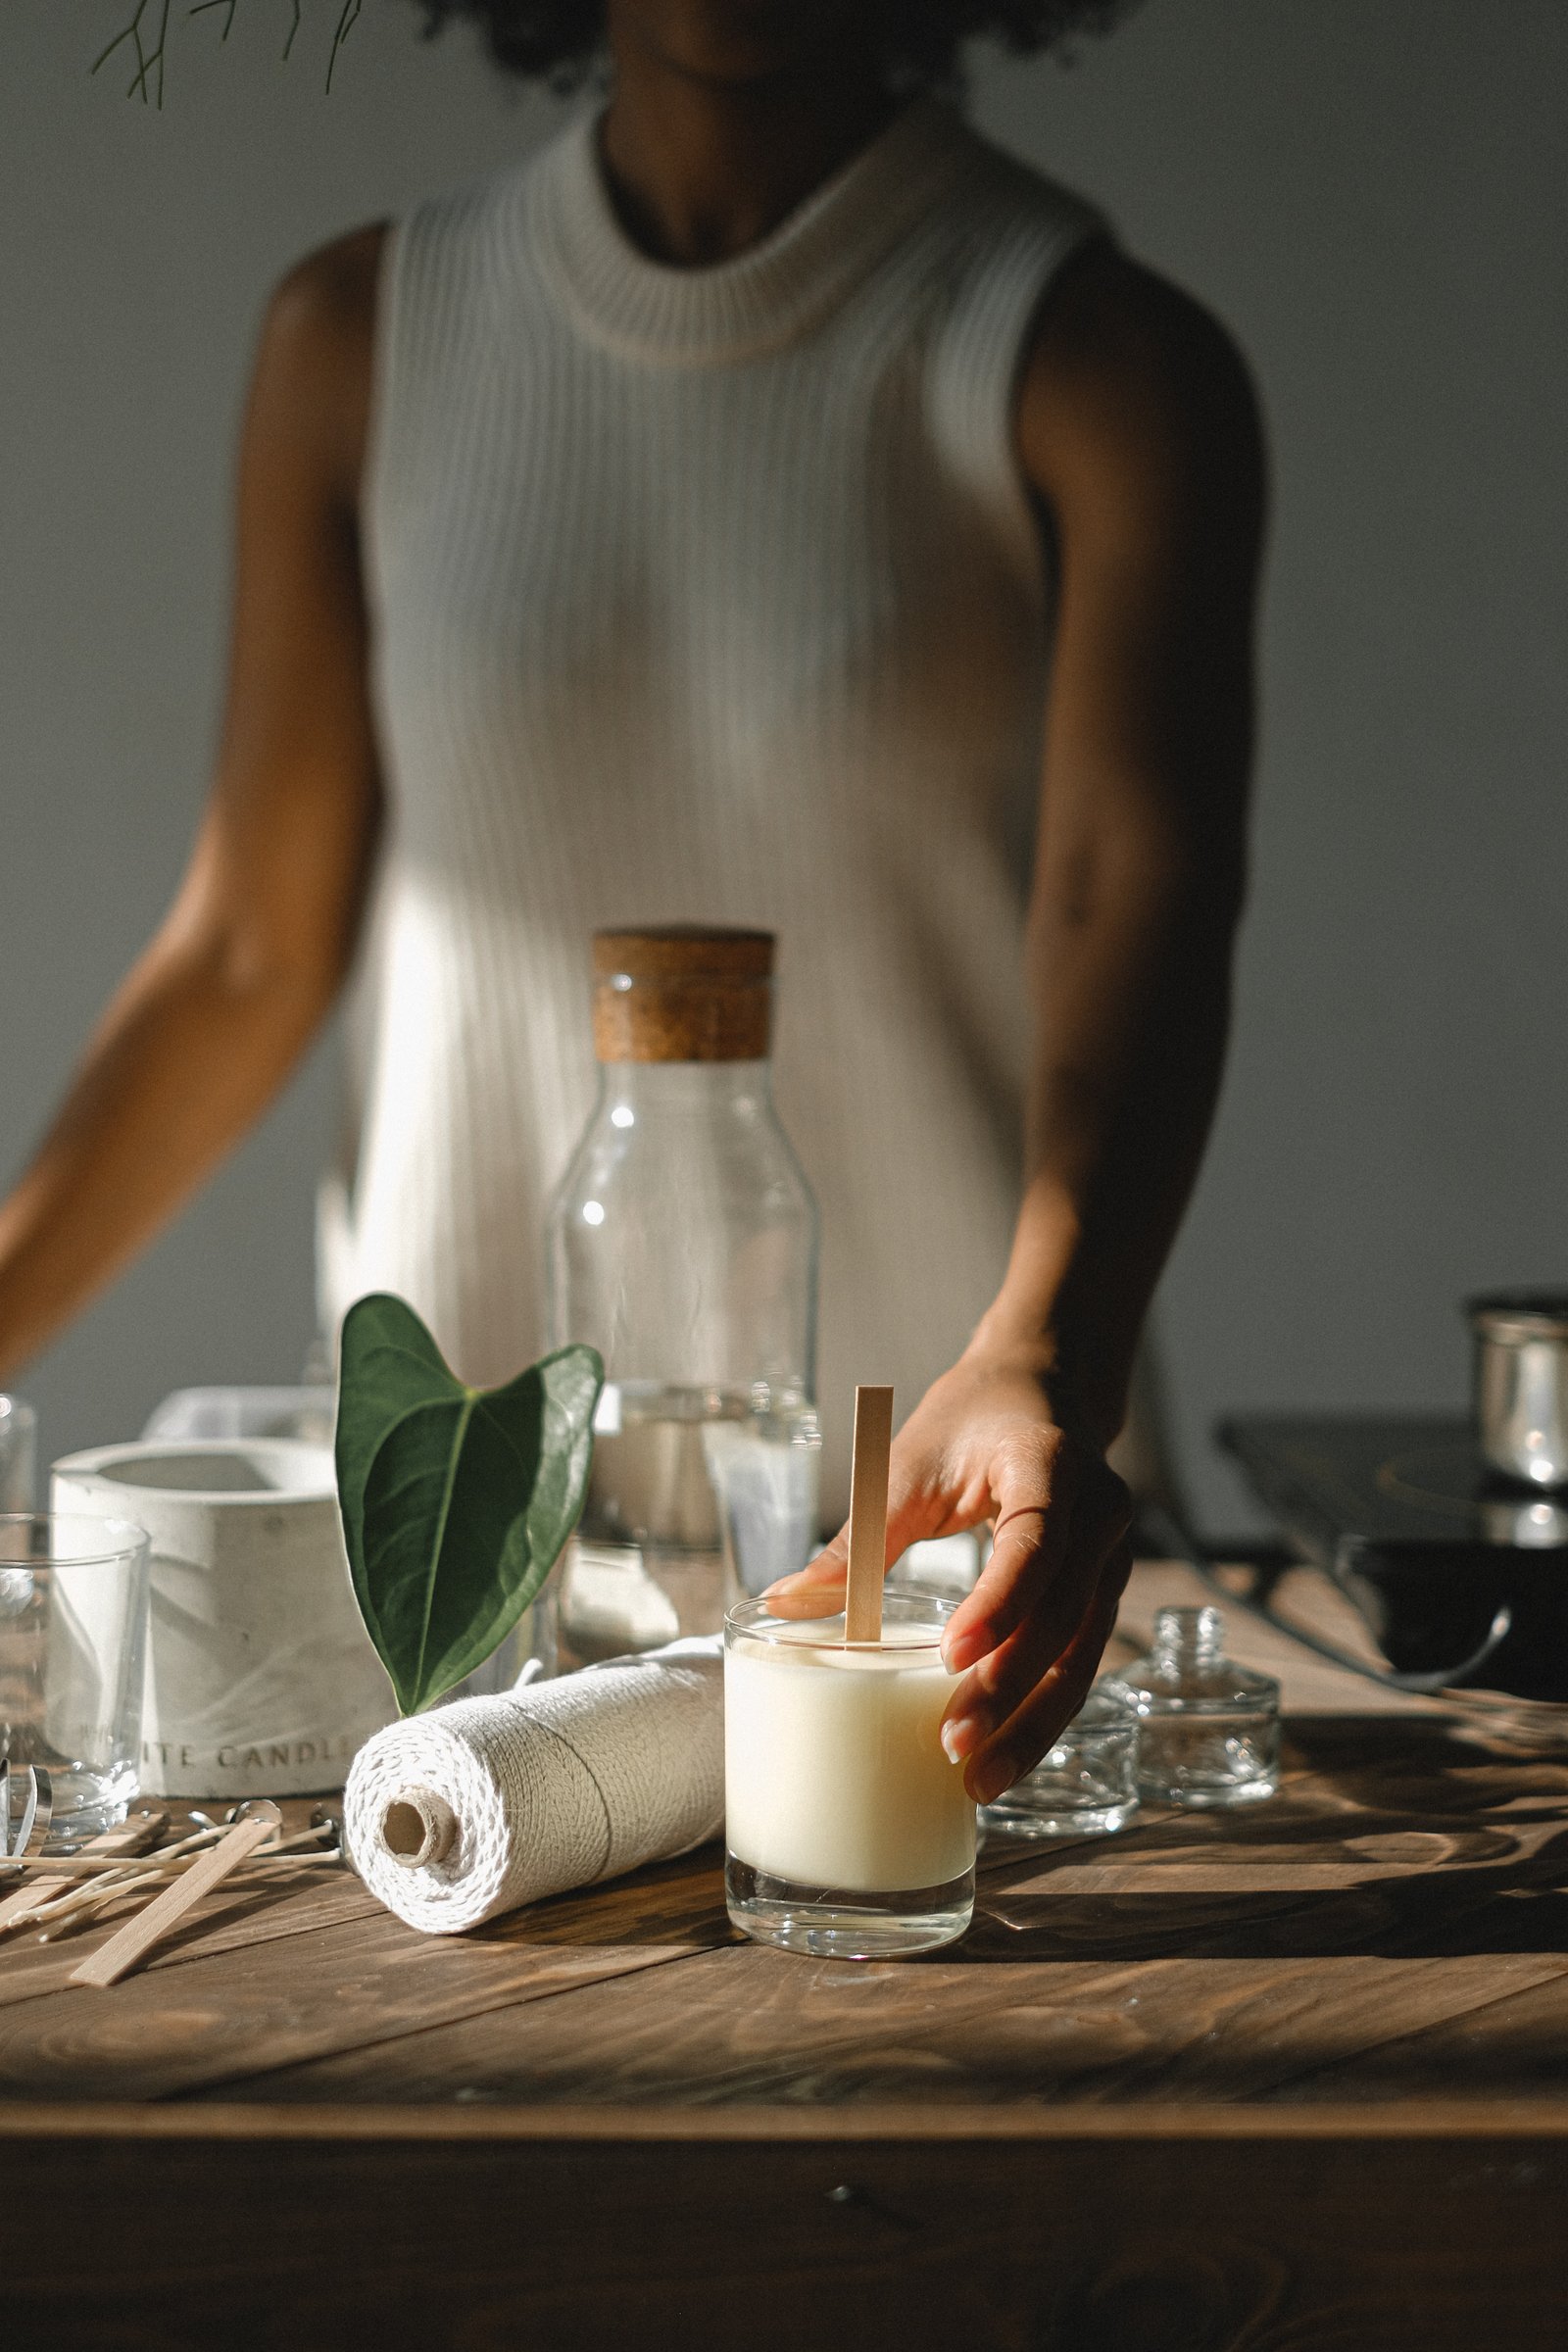
Once your containers have been cleaned, it’s time to prep them by securing wicks inside using glue dots or double-sided tape in case they move during the pouring process. Make sure that the wick is centered in the middle of the container too!
Preparing candle containers is one aspect of making candles that shouldn’t be overlooked because it plays a major role in achieving desired results, whether fragrant aroma or beautiful décor piece! Choose heat-resistant and visually appealing jars/tins, clean them well, and properly secure the wick in the center.
Pouring Wax into Containers
Pouring Melted Wax into Prepared Containers
Now that you’ve prepared your workspace, gathered all the necessary materials and melted your wax, it’s time to pour the wax into your containers. This can be tricky, so take your time and follow these steps to ensure a successful pour. First, make sure your containers are clean and dry.
Any moisture or debris inside the container can affect how the wax sets and adheres to the sides of the container. If you’re using glass jars, warm them up slightly by placing them in a warm oven for a few minutes before pouring in the wax.
Next, carefully pour melted wax into each container until it reaches about 1/2 inch from the top. Make sure to leave room for any additional decorations or toppings you may want to add later on.
Tips on Avoiding Air Bubbles, Spills, and Uneven Surfaces
One of the most common issues when pouring wax into containers is getting air bubbles trapped inside or spilling hot wax onto your workspace. To avoid these issues and get a smooth surface on top of your candle: – Slowly pour melted wax into each container in one steady stream.
Avoid pouring too quickly or too close to the edge of the container.
– Use a chopstick or skewer to gently stir the melted wax inside each container while pouring to help release any air bubbles.
– Tap each container lightly on a hard surface after pouring to release any remaining air bubbles further.
– To avoid spills, have paper towels nearby and work slowly and carefully.
– If you do spill hot wax onto your workspace or clothing, immediately use cold water (not hot!) to cool it down before attempting to wipe it away.
By following these tips and tricks for pouring melted wax into containers, you’ll be well on your way to creating beautiful, professional-looking candles in no time.
Cooling Process
Allowing candles to cool at room temperature
Once you have poured your melted wax into the prepared containers, it’s time to let them cool. It’s crucial to allow your candles to cool at room temperature, as sudden changes in temperature can cause the wax to crack or shrink.
Putting them in a cooler area may be tempting, but this can cause issues that will ruin all the hard work you have put into making the candles. During this stage of the process, avoid moving or touching the candles, as even slight movements can cause air bubbles in your candle.
Air bubbles form when a change in pressure is caused by movement while the wax is still liquid. So keep them away from high-traffic areas and let them sit undisturbed for several hours.
How long it takes for candles to cure fully
The amount of time that it takes for your candle to cure fully will depend on several factors, such as humidity and temperature levels. Generally, soy wax candles take around 24-48 hours to cure fully.
However, some waxes may take longer than others. When determining if your candle has fully cured, look for signs such as a smooth and even surface on top of the candle and no visible air pockets or bubbles.
You should also ensure that the bottom of your container is flat and not concave or convex. While waiting for our beautiful creations to cure can be difficult after putting so much effort into making them perfect, allowing ample time during this step will ensure that we end up with high-quality finished products that we can enjoy for many hours later!
Final Touches
Trimming Wicks After the Cooling Process is Complete
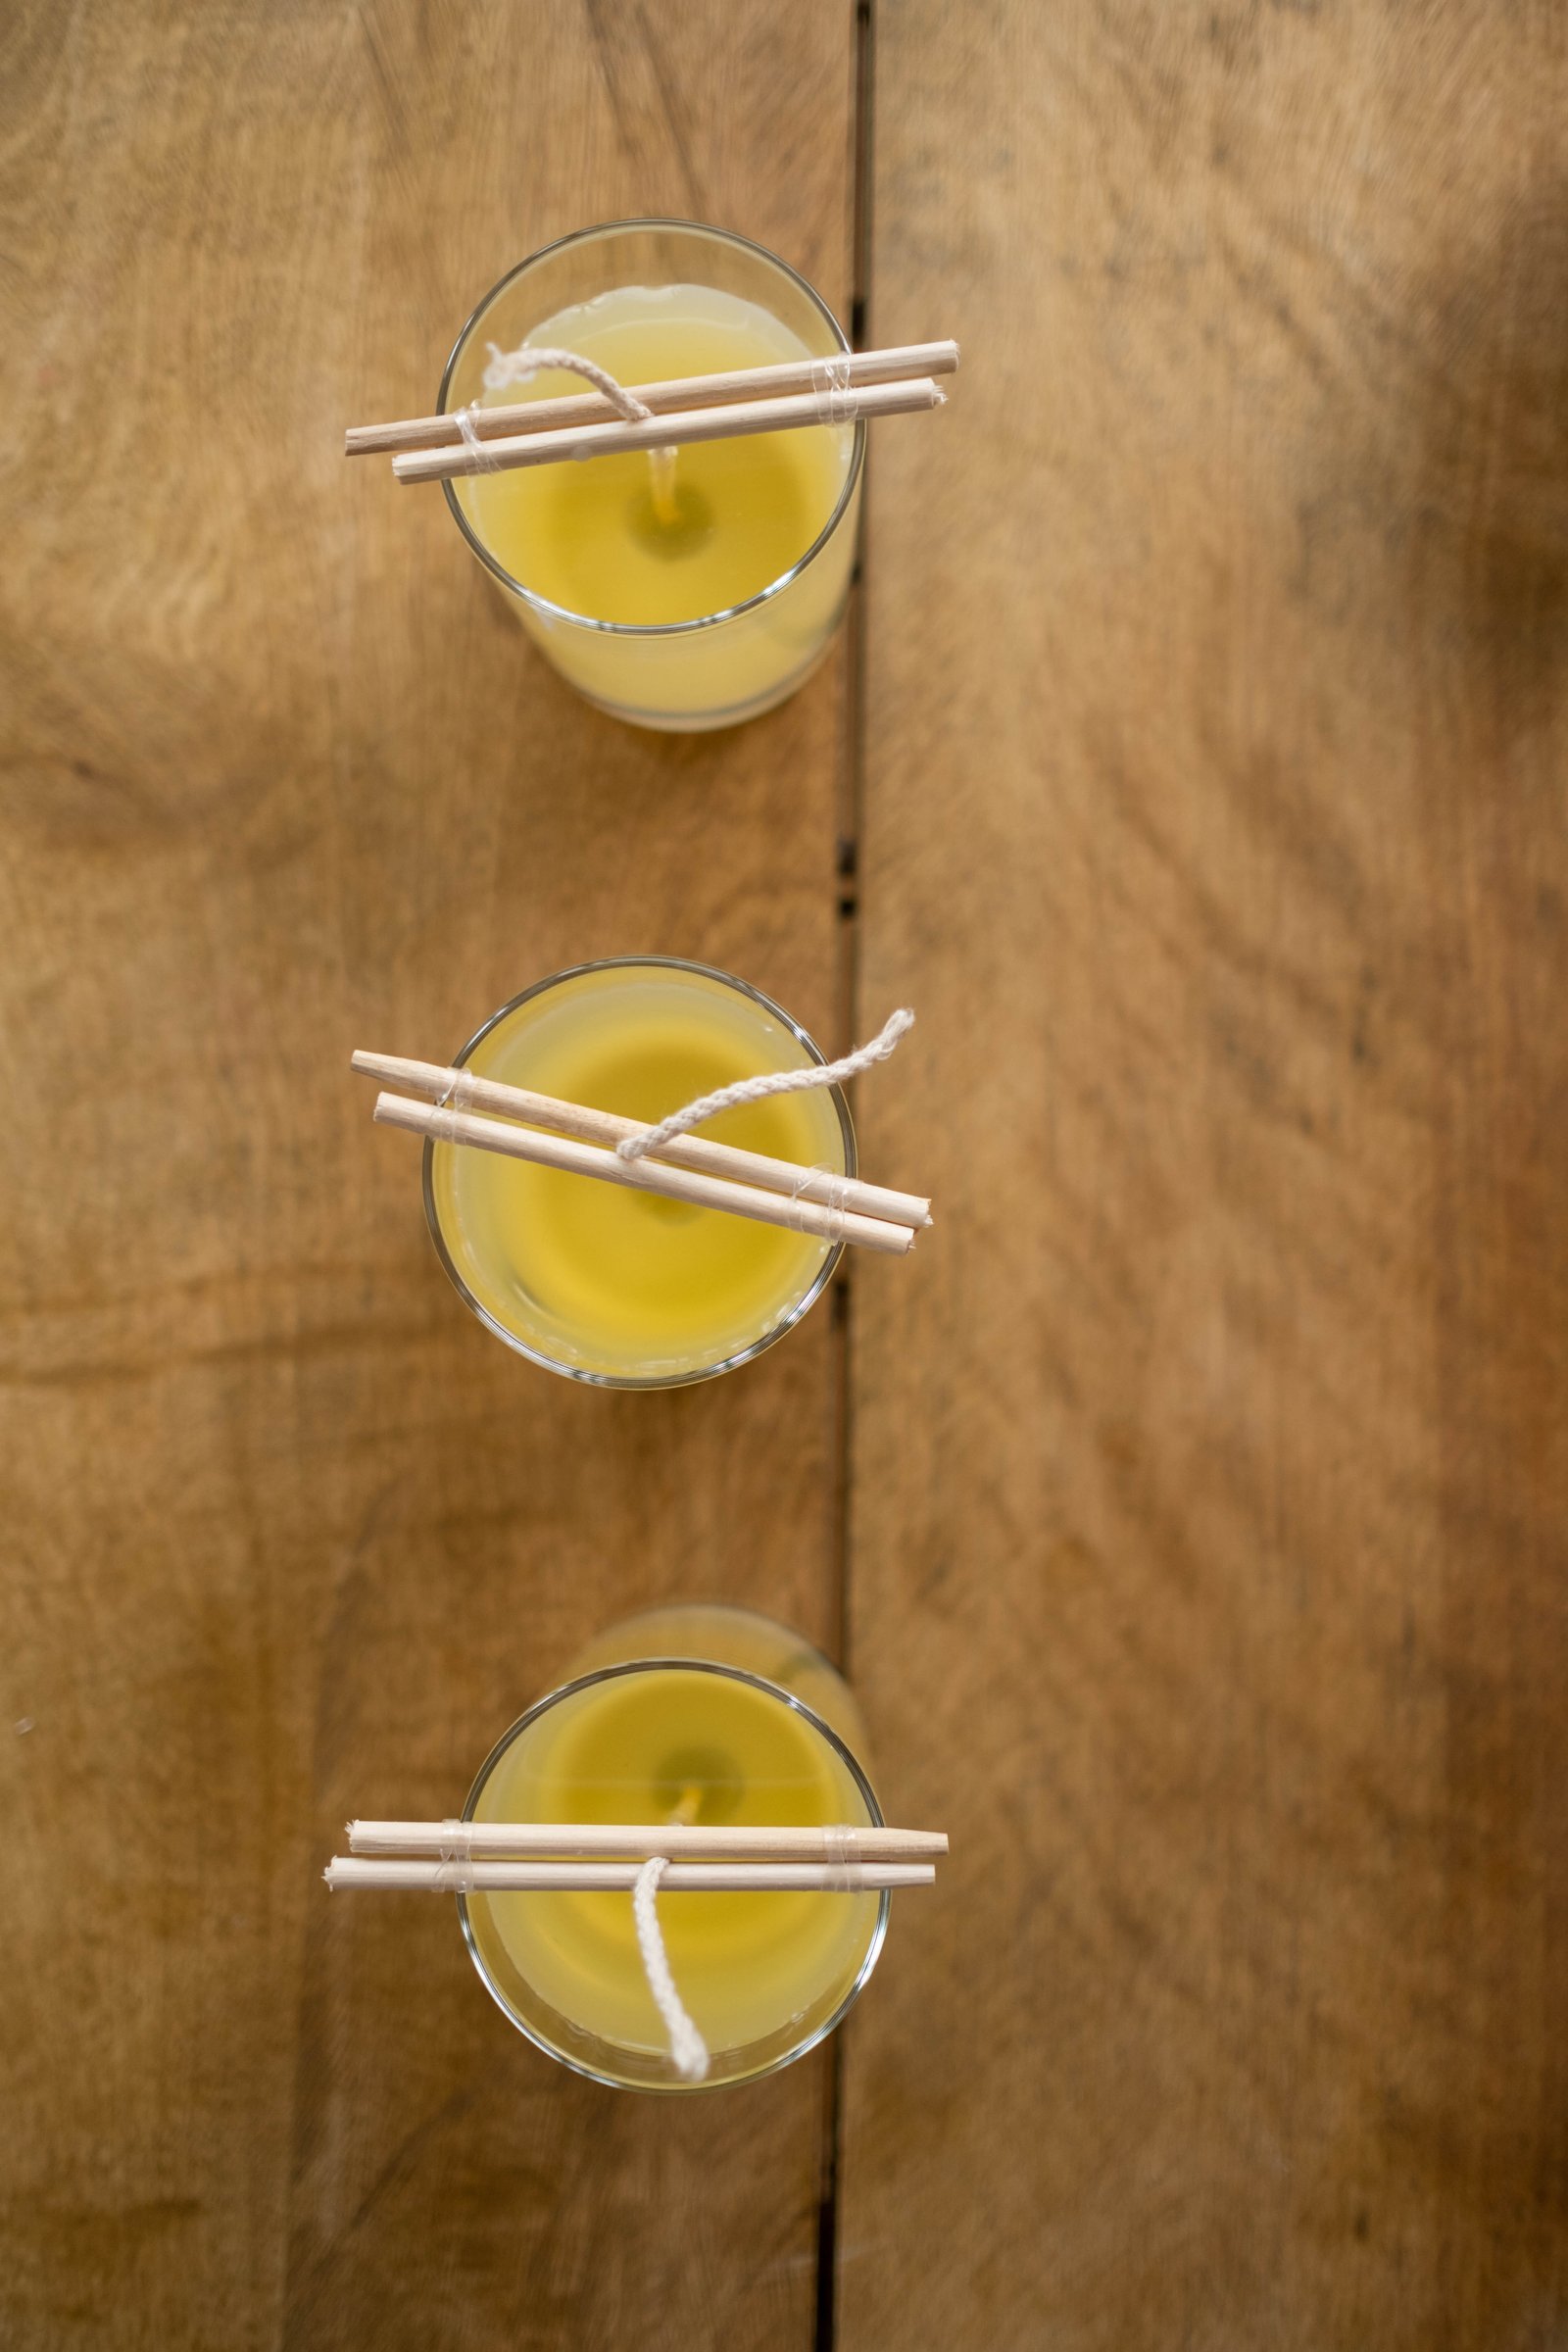
After your candles have cooled and cured, it’s time to give them their final touches. One important step is trimming the wicks.
The wick should be trimmed to about 1/4 inch before lighting the candle. This will ensure a clean burn and prevent excess smoke or soot from accumulating.
Use scissors or a wick trimmer for a precise cut. Trimming the wick also helps control the flame’s size and lengthens the life of your candle.
A shorter wick will burn longer and prevent tunneling or uneven wax melting in future burns. It’s trimming your candle’s wick every time you light it is essential.
Decorating Candles with Ribbons, Labels, or Other Embellishments
Decorating candles can add a personal touch to your creations. You can use ribbons, labels, or other embellishments to make them more unique and special.
Ribbons are easy to dress up in plain jars or tins that hold your candles. Choose ribbons that complement the color or fragrance of your candle for a cohesive look.
Tie them around the jar in a bow or knot for a more rustic feel. Labels are another way to personalize your candles and give them an identity.
Design labels on your computer using graphics software like Canva or Adobe Illustrator, then print them out on adhesive paper. Cut out each label and stick it onto the container.
You can also add other creative touches like charms, beads, dried flowers, and other decorative elements to make your candles stand out even more! Let your imagination run wild when decorating – there are no rules!
Conclusion
Making candles can be an enjoyable and rewarding hobby once you know how to set them up properly without creating a mess. By following the basic candle-making process, you can make high-quality candles that will fill your house with lovely scents.
The preparation process is essential to ensure that the final product turns out as desired, and this includes setting up your workspace correctly and decorating them to your liking. Experiment with different fragrances, waxes, colors, and embellishments to create unique candles that are perfect for gifts or just for yourself!
Conclusion
Recap of the Basic Candle-Making Process
We hope you found this article helpful in teaching you how to prepare and set up your workspace for candle making. Remember, preparation is key! Ensure you have all the necessary materials and a clean, well-lit workspace before beginning the process.
Gather your materials, including wax, fragrance oils, colorants, wicks, and containers. Choose a clean and well-lit area to work in and prep your containers by cleaning and securing the wicks.
Melt your wax using a double boiler or melting pot before adding fragrance oils and colorants. Pour the melted wax into your prepared containers and allow them to cool at room temperature.
Encouragement to Experiment with Different Fragrances, Colors, and Techniques
Now that you know the basics of candle-making preparation, it’s time to experiment with different fragrances, colors, and techniques. Try using essential oils instead of fragrance oils or experiment with different types of wax, such as beeswax or soy wax. When it comes to coloring your candles, there are endless possibilities!
You can use liquid dyes or even try natural options such as beet juice or turmeric powder. Don’t be afraid to get creative when it comes to decorating your candles, either!
Use ribbons or labels with custom designs that reflect your style. Candle-making is a fun hobby that can also be turned into a business venture if desired.
With practice comes experience, so keep going if, at first, things go according to plan. Just remember to enjoy the process as much as possible!